The best way to celebrate Mother’s Day is by spending quality time together. Last year, we tried the Rit Dye Shibori Kit as a Mother’s Day project. An important preface to this blog: neither my mom nor I had ever done tie-dye before. For any other beginners out there: while creating marble patterns with shaving cream and dye might look like an easy project, it turns out to be extremely difficult and messy. After realizing the imminent doom of the shaving-cream technique, we switched to traditional Shibori and tie-dye methods. It saved what was left of our self-esteem!
The Kit
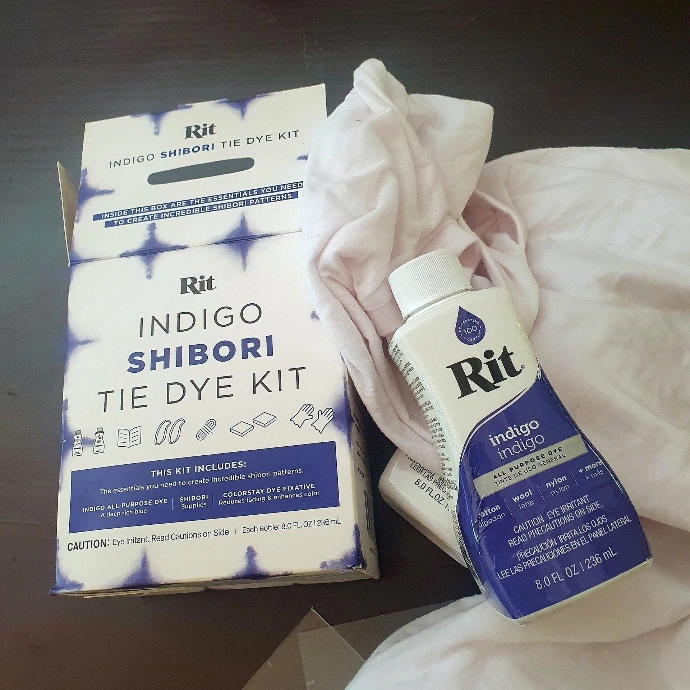
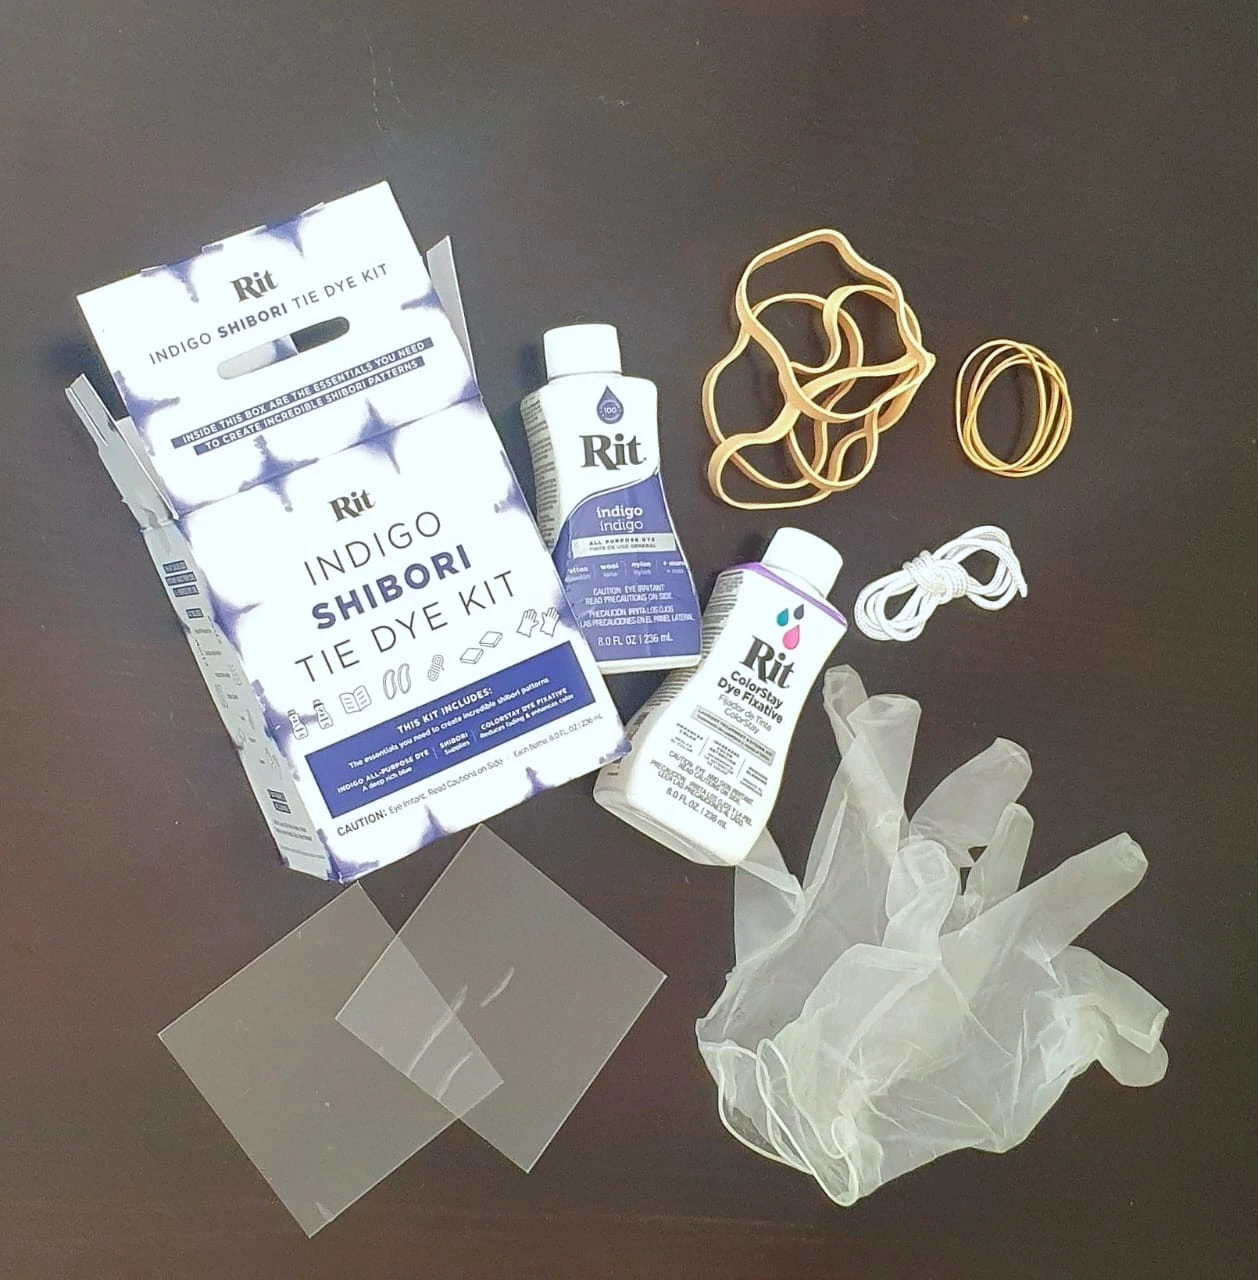 The Rit Dye Indigo Shibori Kit contains everything needed to create three traditional Shibori designs, as well as other patterns such as standard tie-dye. The kit includes Rit All-Purpose Indigo Dye, Rit ColorStay Dye Fixative, rubber bands, gloves, twine, and two plastic squares. We also used a cup of salt and a teaspoon of dish soap to help the fabric colour more evenly. With just one bottle of indigo dye, we were able to transform two shirts, two continental pillowcases, and two old items of clothing that we wanted to upcycle.
Shibori is a traditional Japanese dyeing method where fabric is folded, twisted, or scrunched, then tightly bound before being dyed in indigo, to create intricate patterns. The Kanoko technique is considered one of the easier tie-dye techniques to do, since it only requires twine, which was included in the kit.
We started by preparing the dye bath and the tub with the ColorStay Dye Fixative. It is advisable to cover the working surface with a plastic table cloth. For the dye bath, we filled a deep plastic bucket with 7.5 litres of hot tap water. After giving the dye bottle a good shake, we added it to the water and got ready for the magic to happen.
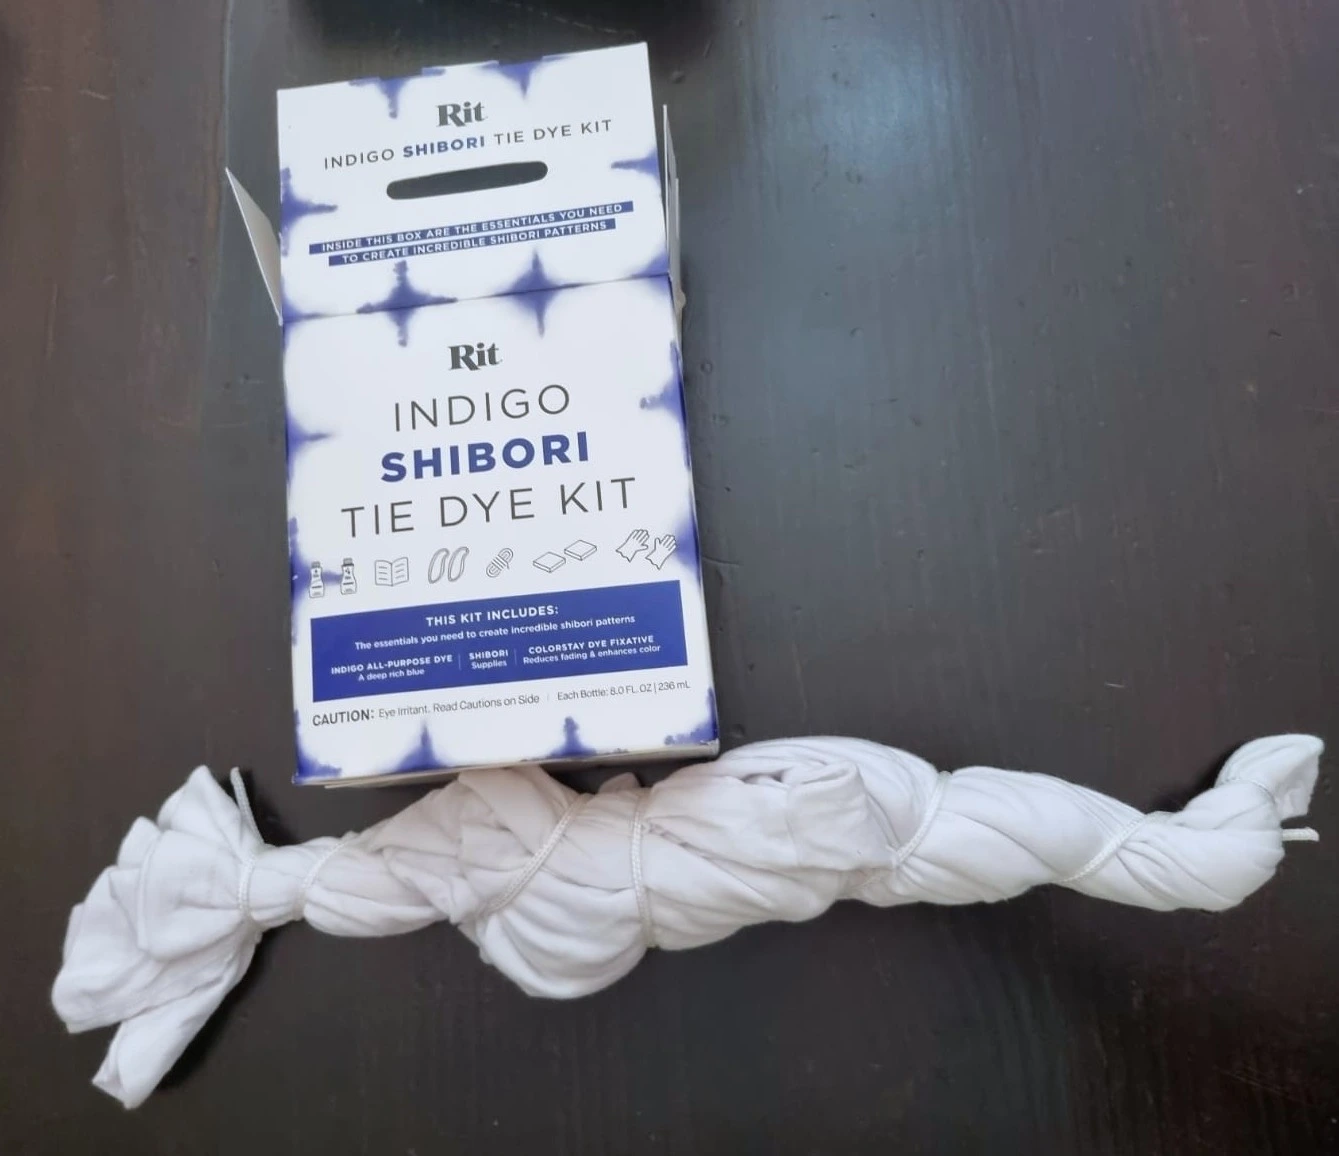
Pinching each shirt at the centre, we let the four corners hang down and tightly secured the fabric with a rubber band about 1 centimeter from the pinch point. Then came the fun part—wrapping the twine in a crisscross pattern all the way down the length of the shirt.
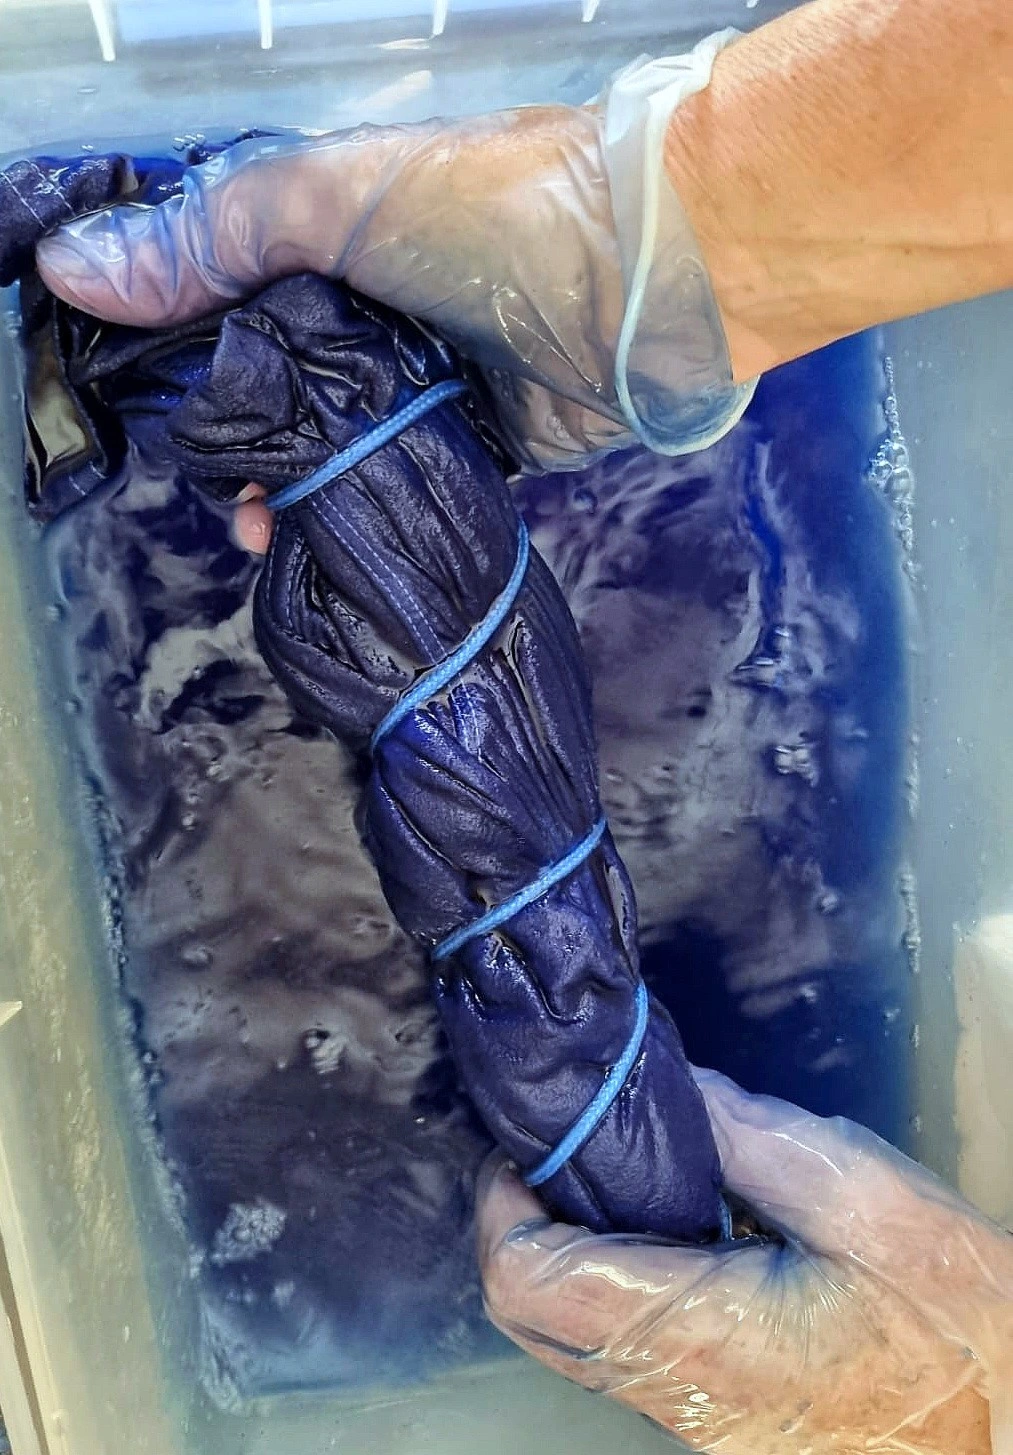
Next, it was time for a dip in the Rit ColorStay Dye Fixative (included in the kit). For our two shirts, we mixed about 120 millilitres of fixative into 11.5 litres of hot water. The tied shirts went into the solution, and we stirred slowly and continuously for about 20 minutes with a stainless steel spoon. It was the perfect excuse for a good chat—and even enough time for one of us to make a cup of tea!
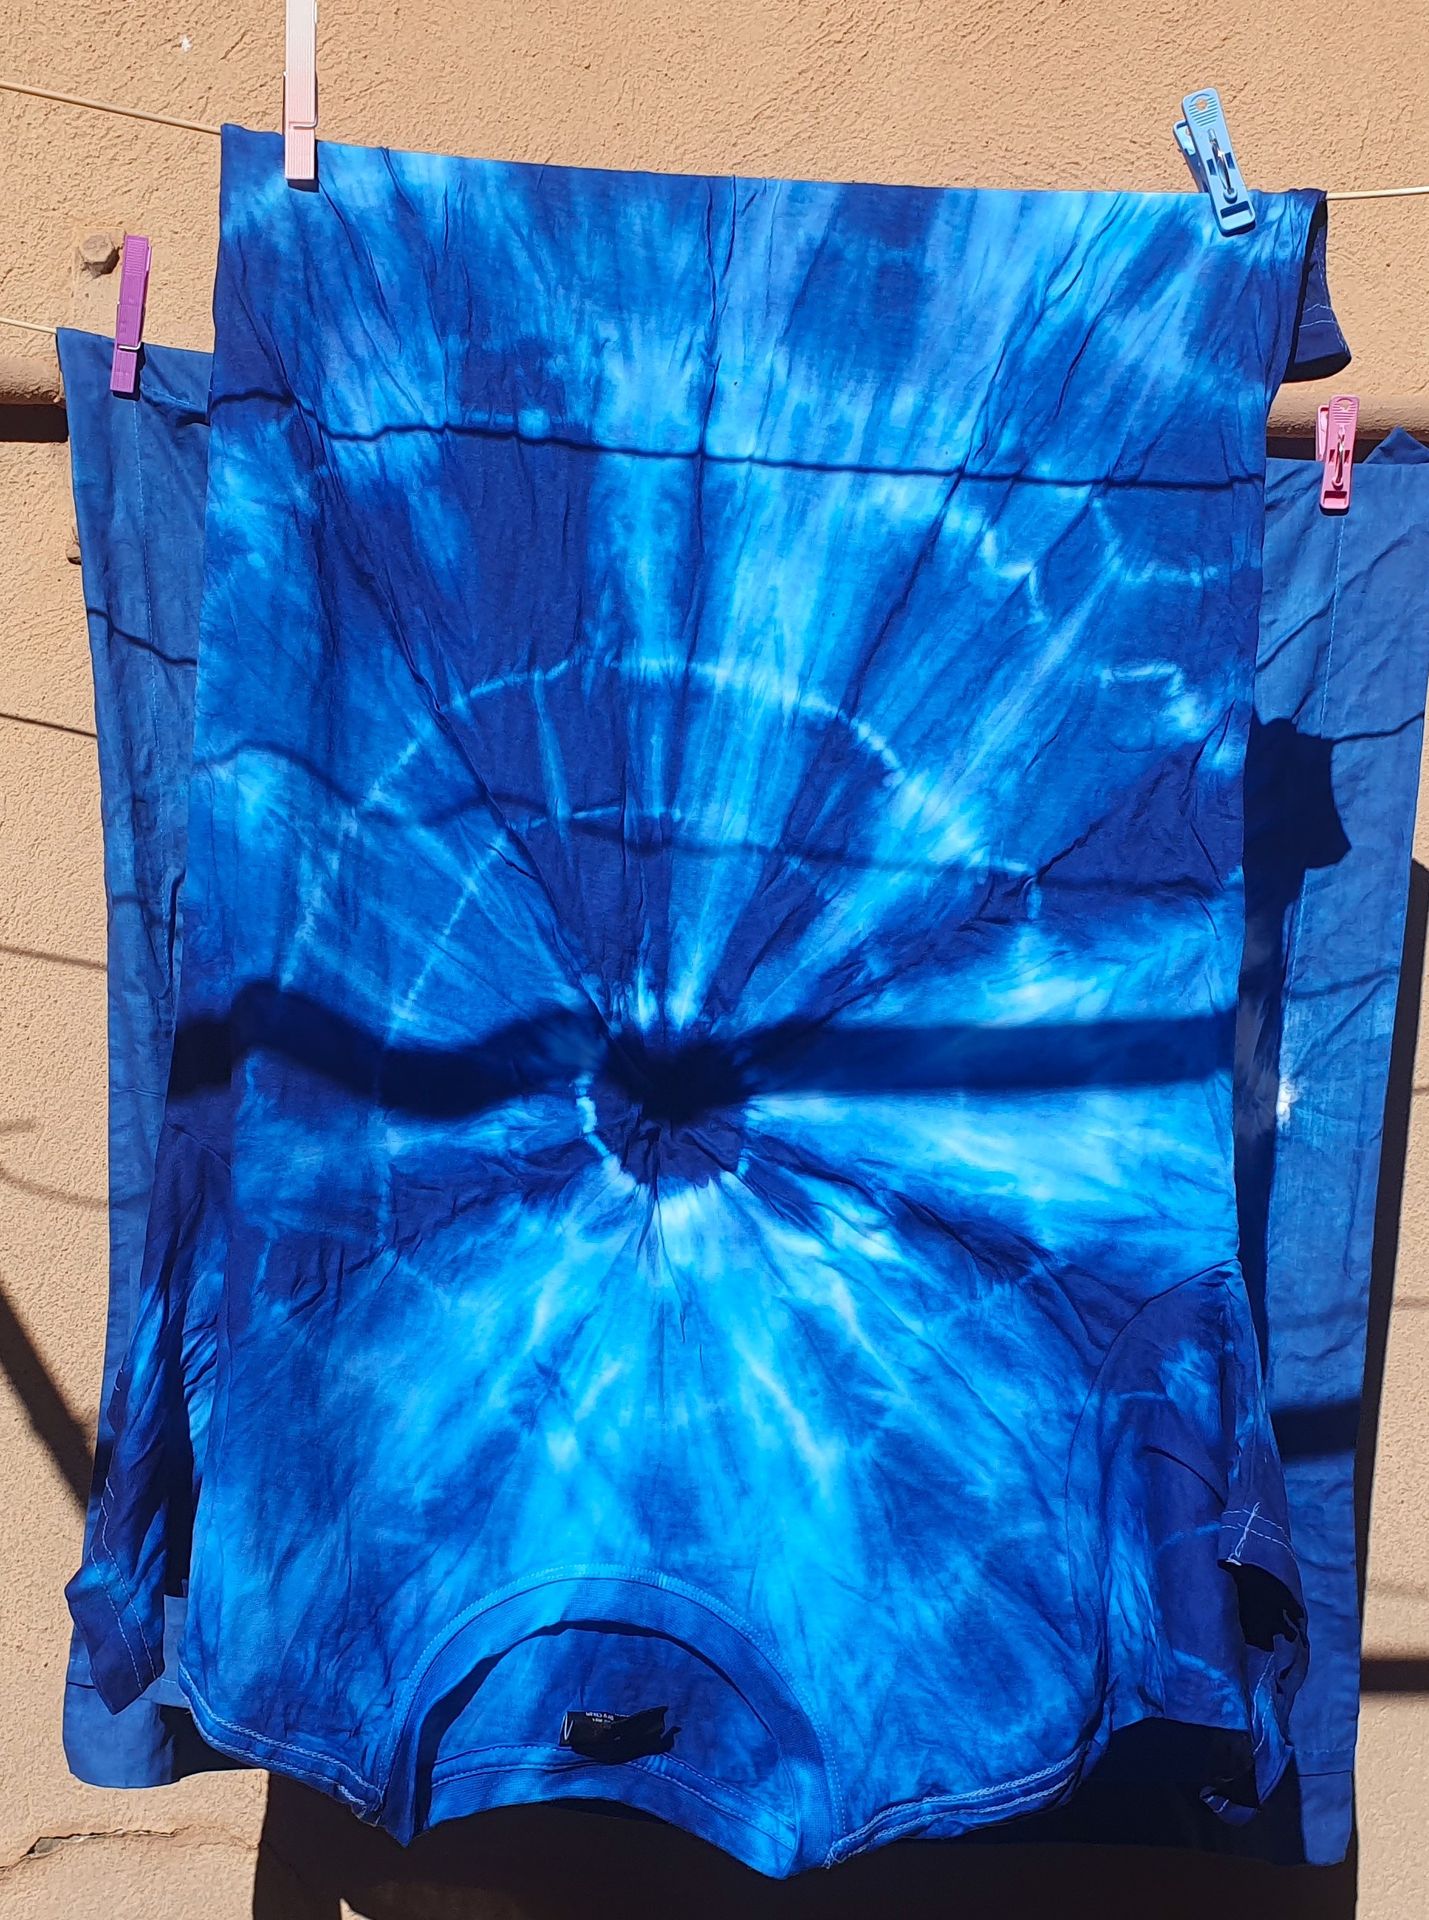
After stirring, we rinsed the shirts in clean water until it ran clear. Then came the big reveal—time to remove the twine and see the one-of-a-kind patterns we’d created! Even though we followed the same technique, each shirt turned out completely unique, thanks to the natural variations in how the twine was spaced and wrapped. After a quick wash, we hung the shirts in the sun to dry.

P.S. Regarding the plastic squares included in the set, we still do not know what it is used for.....
Key ingredients for fun!
plastic table cover
2 plastic tubs
2 white cotton shirts