Introduction-
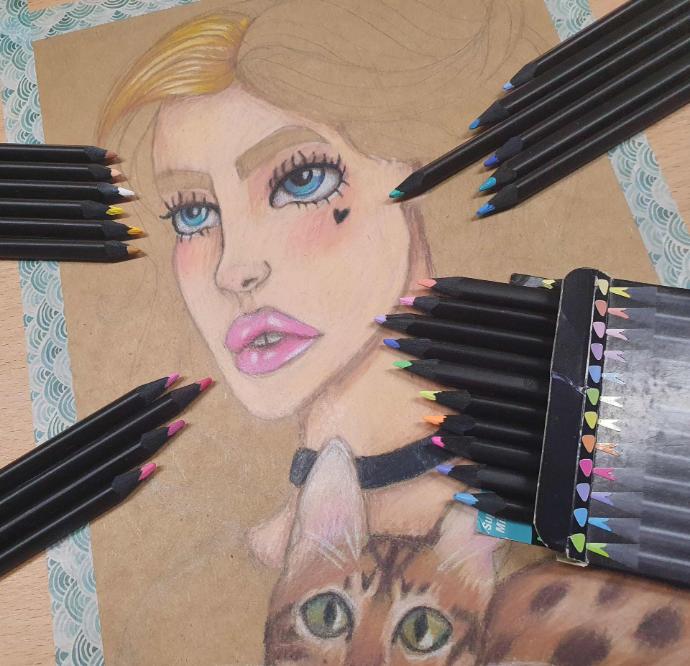
Coloured Pencils are some of the most versatile and beginner-friendly art supplies available. High-quality coloured pencils are essential for those who use their coloured pencils consistently since hand cramps are not for the faint of heart! Faber-Castell introduced the Black Edition series as coloured pencils for trendy teens, high-quality, stylish and unique. These pencils stand out as having one of the best designs for an art supply, with a solid black barrel and ends that represent the colour of the pencil. The most unique thing about these pencils is how they can be used on black paper, standing out beautifully against dark surfaces. This guide is meant to give beginners, or even experienced artists, an overview of the Black Edition Coloured Pencils. This guide comes with a free set of swatch cards and a worksheet.
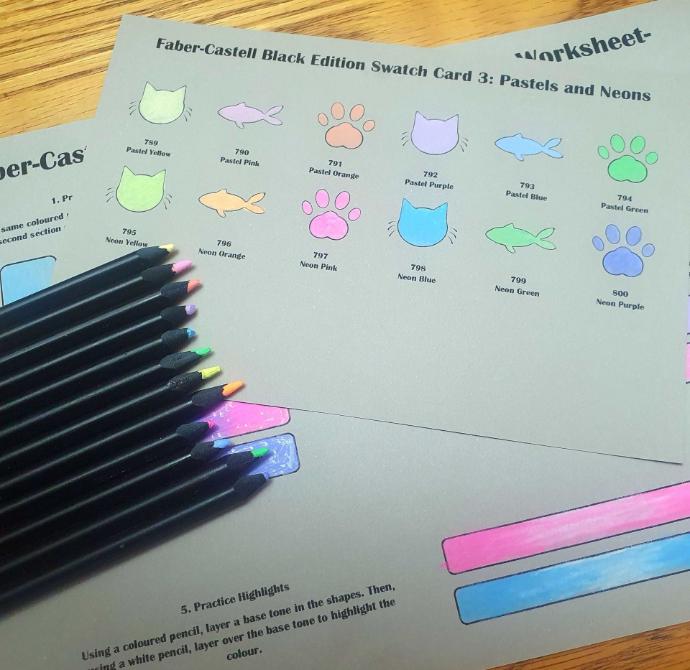
Swatch Cards-
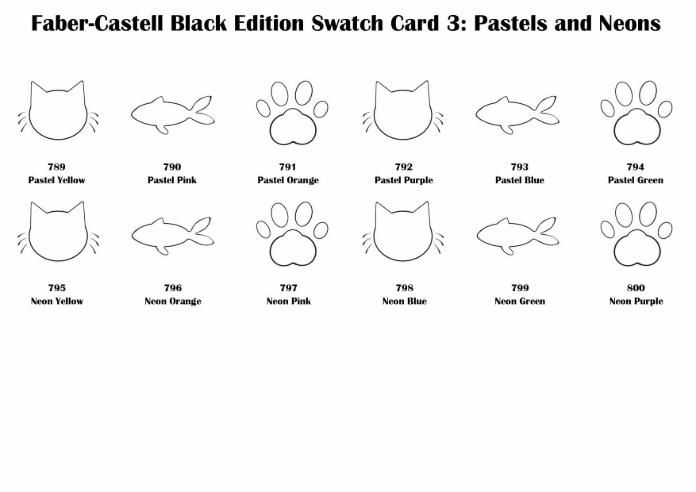
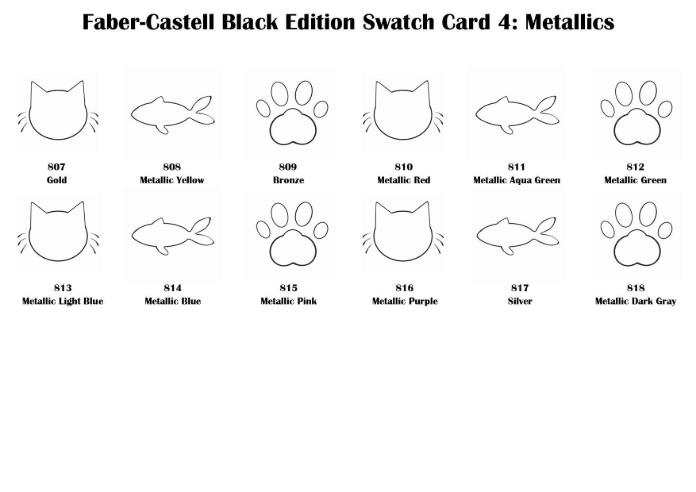
Swatch cards are a great way to test out new art supplies. Swatching refers to testing an art supply on a dedicated piece of paper to see the colour, and the fade of the supply as it dries and to recall specific colours later. It is recommended that swatch cards should be on good quality paper, and with the Black Edition Pencils, toned paper helps the specific colours stand out. Cardstock or pastel paper can also work well for these swatch cards. A few things to keep in mind when purchasing your first set of Black Editions is that not all the sets come numbered. Out of the sets I purchased, the 36, 100 and Metallic sets were all numbered. If you have an unnumbered set, the pencil order when you first receive them can help you correctly fill out the swatch card.
These swatch cards are custom-made, and since we love cats here at Programit, they are right on brand. There are also plain swatch cards to simplify the swatching process available.


Practice Card with Five Basic Colouring Techniques-
1. Practice Layering-
Layering is the easiest coloured pencil technique to learn. The same coloured pencil can be layered multiple times to create a darker shade of the colour. By going over the first square once, you will have the base tone. Laying the same pencil twice in the second square while gradually applying more pressure, will achieve an opaquer look. Finally, layering three times in the third square, while still applying more pressure, will achieve a fully opaque block of colour.
2. Practice Burnishing-
Burnishing is a technique that requires a buildup of colour until the colour is opaque and the coloured area has a distinctive sheen. This technique is achieved by layering a single colour over and over in light layers. Once these light layers are achieved, the final layer is done by applying more pressure to the paper and polishing to create a smooth finish. It is easier to colour in small circles when burnishing.
3. Practice Blending-
Blending is an important colouring technique and is easy to learn and master. First, pick two colours to blend. It will be easier if these colours are similar in hue and tone, and more difficult as you begin to blend colours with different hues and tones. First, lightly layer one colour from the left and fade it out when it reaches the middle of the shape. Then, using the second pencil, colour from the right and fade it out once it reaches the middle. The colours should overlap in the middle. Continue to layer the two colours, but with each layer, apply more pressure to the pencils. In the end. It should form one solid gradient across the shape.
4. Practice Underpainting-
Although the underpainting technique is most often associated with paint, coloured pencils can also be used to achieve this look. First, start by establishing shadows and light with the coloured pencils. Look for areas to add shadow and light, lightly layering both the dark and light pencil. Once you have added two layers of shadow and light, take a mid-tone pencil and burnish across the whole shape. The mid-tone should pick up the pigments from the colour beneath and should cause the colours to vary. Underpainting is used to tint the final looks, and can be used to establish shadows and light early in the illustration process,
5. Highlighting
Good quality white pencils are an indispensable tool for colouring. Once you have layered a base tone, white can be used to add a bright highlight to the coloured surface. This is done by colouring over the established base with a white pencil. By varying the amount of pressure applied, the highlight will seem brighter or duller.
Conclusion-
I hope that you find the swatch cards and tutorials useful. Black Edition Coloured Pencils make a great gift art supply, for both beginners and experienced artists. From personal experience, these pencils are a great, affordable way to get started as a young artist.
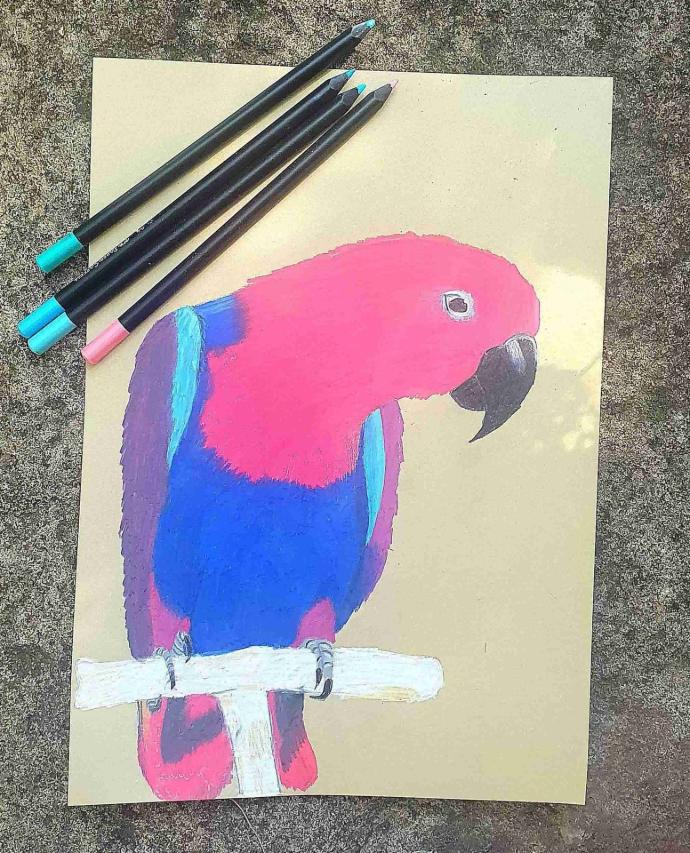
For this guide, I included a stunning drawing made by a talented young artist! This illustration was dedicated to the parrot that lives next door to our office. A special thanks to our talented young artist for making this illustration!